A common problem that may occur when working with an industrial manufacturer is that they will often need to correct dimensioning measurements from your original drawing. Your manufacturer will make these edits so they will be able to model the part and confidently meet the outlined measurements during inspection. However, these corrections require extra time and labor cost to keep the project moving forward. To help you prevent these common dimensioning mistakes we’ve put together some reference pictures and information to help you understand the correct dimensioning information to give your manufacturer.
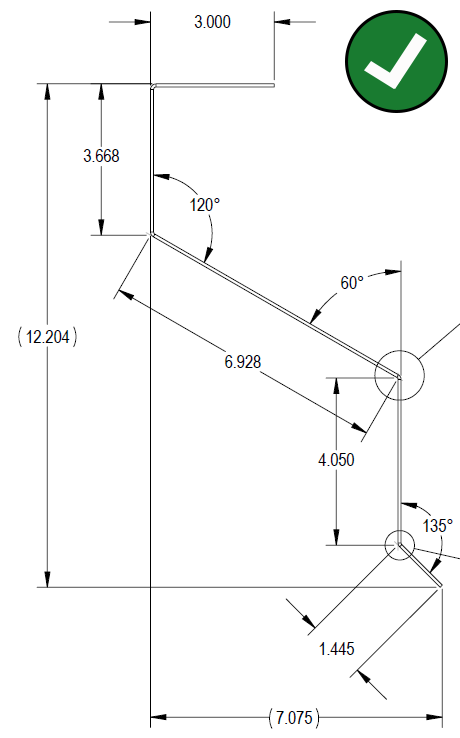
Why is this Dimensioning Correct?
- Shows overall dimensions, bend shape, and angles—NOTE: Dimensions are to a theoretical sharp
- Part can be modeled by your manufacturer to match exactly what you need
- Dimensions can easily be measured during inspection from a defined point to another
Why is this Dimensioning Incorrect?
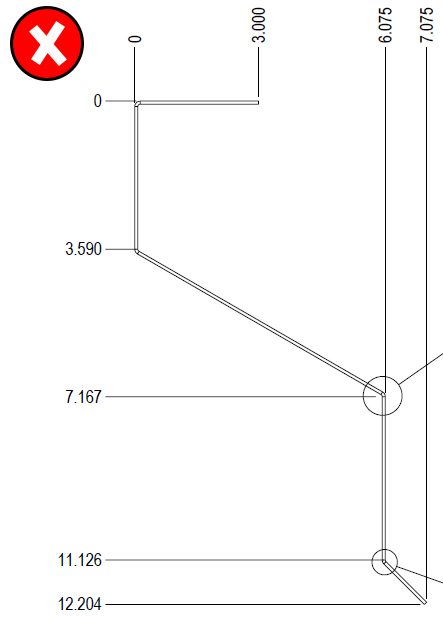
- All dimensions given are off bend tangent points and therefore unmeasurable
- No angles listed
Because of these issues, your vendor will more than likely need an actual part sample or 3-D model to process the part, affecting your lead times and adding unnecessary costs, such as engineering fees to make corrections to the dimensions. You may also have to go back to your own customer to get approval and answers before the project can move forward.
Theoretical Sharp
Your manufacturer will need points on the final part that can be measured. Often, drawings can show dimensions that can’t be measured during inspection because it’s a transition point within a bend, or it’s a point hidden by a weld or feature. Dimensions should always be measured to the theoretical sharp and not a bend tangent, shown below.
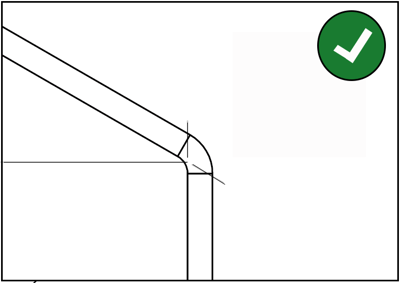 Theoretical Sharp (dimension to theoretical sharp)
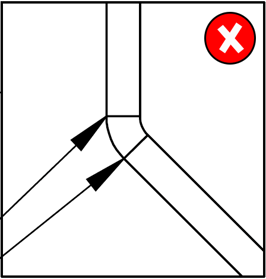 Bend Tangents (do NOT dimension to bend tangents)
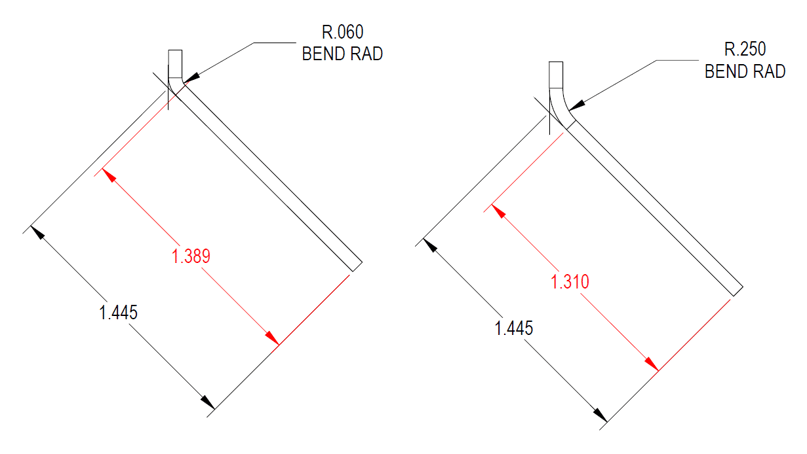
Note how the different bend radii below change the tangent dimension shown in red when changing from .060” to .250”. However, the theoretical sharp dimension shown in black is not affected by the bend radius change, which is often changed because each manufacturer has different capabilities. If your manufacturer has to go through correcting each tangent dimension, it will add extra time and labor costs to your project for their rework efforts. Dimensioning to the theoretical sharp from the beginning is a quick and easy fix to this problem.
Providing more accurate dimensions to your industrial manufacturer and vendor negates the possibility of time-consuming, and in some cases, costly corrections and rework. You can make everyone’s job easier, including your own, by dimensioning with manufacturability in mind. If you have any questions, or if you would like to start your own industrial project, please contact us today.

 HUI dedicates itself to helping our customers design the solutions they need and launching quality products on time and within budget.