The decisions you make about the bend radius during the design stage will determine how difficult it will be to produce the design. That’s why it is important to understand the material’s capabilities and what you should avoid designing around a bend, so you can avoid common press brake design mistakes before the design goes into production. The following list explains four common bend radius mistakes, and how to prevent them.
1. Choosing a bend radius that is too tight for the material.
A bend radius that is too tight can create a weak point in the metal, causing it to break easily. It can also cause a permanent deformity that alters the dimensions of the part.
How to Avoid
- Understand different metals have different minimum bend radius-to-thickness ratios:
- The harder and thicker the metal, the greater the minimum bend radius.
- Minimum inside bend radius is also larger when bending with the grain (longitudinal) than across the grain (transverse).
- Determine the ratios based on the data provided by you material supplier, whether you are bending with or against the grain, and information specific to the application.
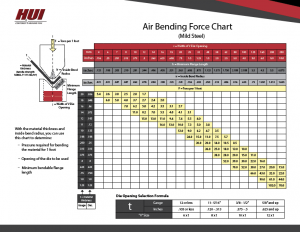
- Refer to our free “Air Bending Force Chart” reference to determine the minimum inside bend radius for mild steel. The yellow zone outlined on the chart is the “sweet spot,” and will provide you with the best results.
(To view chart click here to download.)
2. Placing holes, slots, notches or any other features too close to bend radius.
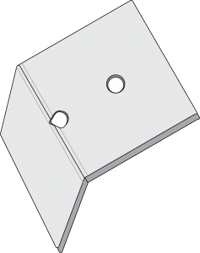
Placing features too close to the bend radius or even at the edge of the die opening will distort the features and the part may no longer be able to hold necessary hardware near the bend radius.
How to Avoid
- Features should be placed no closer than three times the thickness, plus the bend radius from the bend.
- Consider extending the opening past the bend line, if a feature must be nearer to the bend than recommended.
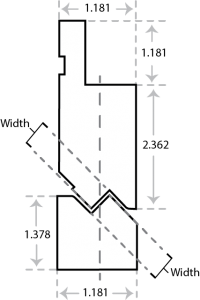
3. Forming offsets (jogs) too close to one another.
Offsets that are too close to one another can’t be produced with standard press brake tooling. These offsets require special tooling that isn’t worth the extra expense for low volume orders.
How to Avoid
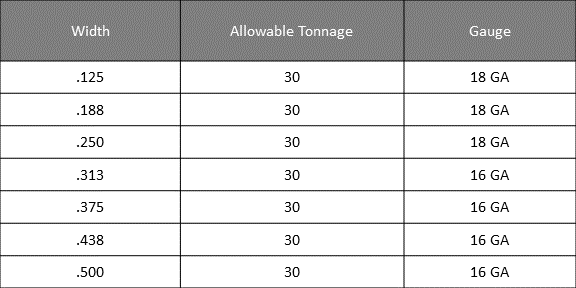
- Refer to the table below to determine the standard offset size. If you have a measurement outside of this table, contact one of our HUI engineers to help you determine an alternative solution.
4. Requiring a flange that is too narrow.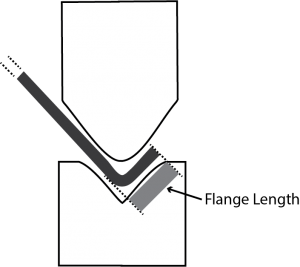
A narrow flange can overload the equipment, distort the part and damage the tooling.
How to Avoid
- Minimum inside flange width should be at least four times the stock thickness, plus the bend radius to accommodate the tooling.
- Refer to the free “Air Bending Force Chart” reference to determine the minimum Flange Length for mild steel.
Keeping these common bend radius mistakes and solutions in mind during the design engineering process will help eliminate time-consuming fabrication revisions when your product hits production. If you have more questions about bend radius issues, or how our press break knowledge can benefit your industrial project, contact us today.
To get instant updates anytime we have a new blog post, please click here to subscribe to HUI's Industrial Blog.

 HUI dedicates itself to helping our customers design the solutions they need and launching quality products on time and within budget.